1000 pages….
usually using option button to instead.
Chapter 1: implementing controls and views
1.0 introduction
intact |ɪnˈtækt|adjective完好无损的 ‹object›; 未受损害的 ‹reputation›to survive intact未受损伤地幸存下来to keep their traditional way of life intact保持传统生活方式不受外界影响
aforementioned |əˌfɔːˈmenʃənd|adjective上述的the aforementioned Fred Jones前面提到的弗雷德琼斯
MVC
Creating and Running Our First iOS App
provision |prəˈvɪʒ(ə)n| noun [ mass noun ]1 the action of providing or supplying something for use: new contracts for the provision of services.
embark |ɪmˈbɑːk, ɛm-| verb [ no obj. ]1 go on board a ship or aircraft:
done, this is just the first step toward our bigger goal of mastering the iOS SDK, LOL
Defining and Understanding Variables
NSInteger and NSUInteger : primitive data type
NSNumber : Allows you to store numbers as objects.
id : These are calleduntypedobjects. Whenever you want to pass an object from one place to another but do not wish to specify its type for whatever reason, you can take advantage of this data type.
NSDictionary and NSMutableDictionary : These are immutable and mutable variants of hash tables.
NSArray and NSMutableArray
NSSet, NSMutableSet, NSOrderedSet, NSMutableOrderedSet : they differ from arrays in that they contain only unique objects.
NSData and NSMutableData:
Point:
NSString *myString = @"Objective-C is great!”;
/* Set the myFloat variable to PI */
CGFloat myFloat=M_PI;
/* Create a pointer variable that points to the myFloat variable */
CGFloat *pointerFloat = &myFloat;
Creating and Taking Advantage of Classes
derive |dɪˈrʌɪv| verb [ with obj. ] (derive something from)obtain something from (a specified source):they derived great comfort from this assurance.
code naming basics : Cocoa’s naming convention for methods.
qualifier |ˈkwɒlɪfʌɪə(r)| noun1 a person or team that qualifies for a competition or its final rounds. he was the fifth-fastest qualifier.• a match or contest to decide which individuals or teams qualify for a competition or its final rounds. England's next World Cup qualifier.2 Grammar a word or phrase, especially an adjective, used to attribute a quality to another word, especially a noun.• (in systemic grammar) a word or phrase added after a noun to qualify its meaning.
person.h
@interfacePerson:NSObject
@property(nonatomic,copy)NSString*firstName;
@property(nonatomic,copy)NSString*lastName;
@end
nonatomicproperties are not thread-safe. You can also specifyassign,copy,weak,strong, orunsafe_unretainedas the property qualifiers.
code naming - properties and data type naming:
property qualifier:
strong: Properties of this type will be retained by the runtime. These can only be instances of classes. In other words, you cannot retain a value into a property of typestrongif the value is a primitive. You can retain objects, but not primitives.
copy: The same asstrong, but when you assign to properties of this type, the runtime will make a copy of the object on the right side of the assignment.
assign : Objects or primitive values that are set as the value of a property of typeassignwill not be copied or retained by that property.
unsafed_unretained : = assign
weak : The same as theassignqualifier with one big difference. In the case of objects, when the object that is assigned to a property of this type is released from memory, the runtime will automatically set the value of this property tonil.
atomic vs nonatomic ps:
What "atomic" does not do is make any guarantees about thread safety. If thread A is calling the getter simultaneously with thread B and C calling the setter with different values, thread A may get any one of the three values returned -- the one prior to any setters being called or either of the values passed into the setters in B and C. Likewise, the object may end up with the value from B or C, no way to tell.
atomic is default behaviour.
app delegate’s implementation (AppDelegate.m) file
TROUBLE 1: #import “Person.h” vesus #import <Person.h>
- (BOOL)application:(UIApplication*)application didFinishLaunchingWithOptions:(NSDictionary*)launchOptions
{
// Override point for customization after application launch.
Person*person = [[Personalloc]init];
person.firstName=@"Steve";
person.lastName=@"Jobs";
self.window= [[UIWindowalloc]initWithFrame:[[UIScreenmainScreen]bounds]];
self.window.backgroundColor= [UIColorwhiteColor];
[self.windowmakeKeyAndVisible];
returnYES;
}
Adding Functionality to Classes with Methods
A typical method:
-
an instance method (-) or a class method (+).
2. the methods and the selector
-(void)singSong:(NSData*)paramSongDataloudly:(BOOL)paramLoudly{/* The parameters that we can access here in this method are:
         paramSongData (to access the song's data)
         paramLoudly will tell us if we have to sing the song loudly or not
         */
}
In the previous example, the external name of the first parameter issing‐ Song, whereas its internal name isparamSongData. The external name of the second parameter isloudly, but its internal name isparamLoudly. The method’s name and the external names of its parameters combine to form what is known as theselectorfor the method. The selector for the aforementioned method in this case would besing Song:loudly:. A selector, as you will later see in this book, is the runtime identifier of every method. No two methods inside a single class can have the same selector.
Conforming to Requirements of Other Classes with Protocols
objective-C ‘ s protocol equals interface in Java.
ps1: import vs include
The #import directive was added to Objective-C as an improved version of #include. Whether or not it's improved, however, is still a matter of debate. #import ensures that a file is only ever included once so that you never have a problem with recursive includes. However, most decent header files protect themselves against this anyway, so it's not really that much of a benefit.
Basically it's up to you to decide which you want to use. I tend to #import headers for Object-C things (like class definitions and such) and #include standard C stuff that I need. For example, one of my source files might look like this:
#import <Foundation/Foundation.h>#include<asl.h>#include<mach/mach.h>
ps2: @import vs #import
ps3: import “” vs import <>
Objective-C has this in common with C/C++; the quoted form is for "local" includes of files (you need to specify the relative path from the current file, e.g. #include "headers/my_header.h"), while the angle-bracket form is for "global" includes -- those found somewhere on the include path passed to the compiler (e.g. #include <math.h>).
So to have your own headers use < > not " " you need to pass either the relative or the absolute path for your header directory to the compiler. See "How to add a global include path for Xcode" for info on how to do that in Xcode.
See this MSDN page for more info.
ps 4: ns prefix
The original code for the Cocoa frameworks came from the NextStep libraries Foundation and AppKit (those names are still used by Apple's Cocoa frameworks), and the NextStep engineers chose to prefix their symbols with NS.
cg: core graphic
Storing Items in and Retrieving Them from Collections
__unused: The__unusedmacro tells the compiler not to complain when a vari‐ able, such as thefirstStringvariable in our example, is declared but never used. The default behavior of the compiler is that it throws a warning to the console saying a variable is not used. Our brief exam‐ ple has declared the variables but not used them, so adding the afore‐ mentioned macro to the beginning of the variable declaration keeps the compiler and ourselves happy. (卖萌可耻)
NSArray
NSMutableArray
NSDictionary
NSMutableDictionary
NSSet
NSMutableSet
NSOrderedSet
NSMutableOrderedSet
NSCountedSet // it’s mutable
Adding Object Subscripting Support to Your Classes
contrived |kənˈtrʌɪvd| adjectivedeliberately created rather than arising naturally or spontaneously.• created or arranged in a way that seems artificial and unrealistic: the ending of the novel is too pat and contrived.
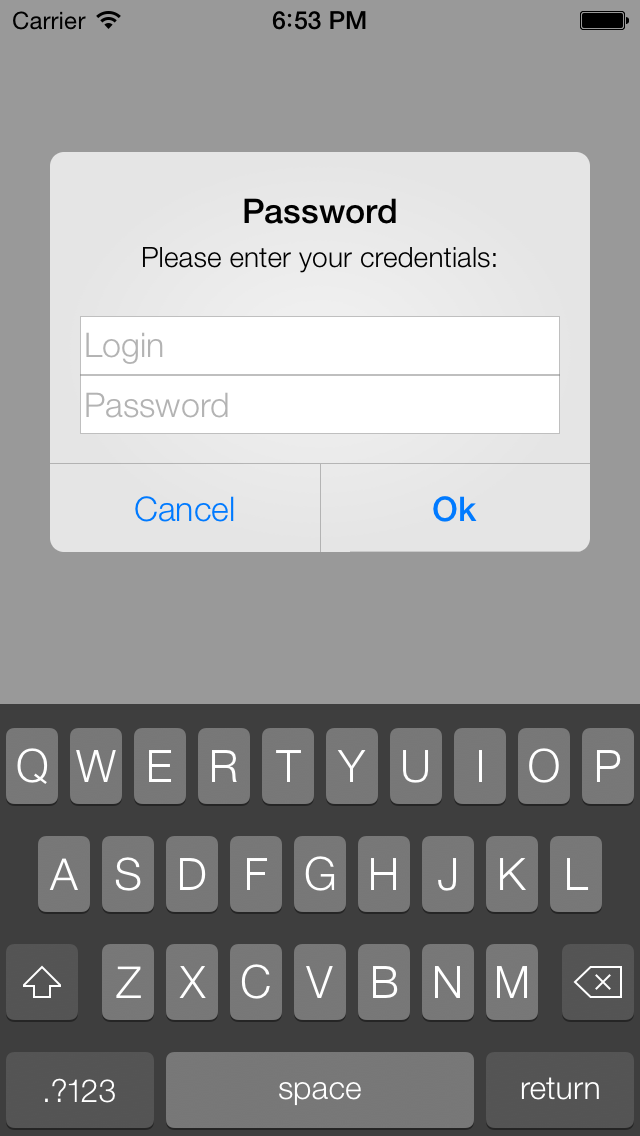
1.1. Displaying Alerts with UIAlertView
sentinel |ˈsɛntɪn(ə)l| noun1 a soldier or guard whose job is to stand and keep watch: soldiers stood sentinelwith their muskets.
UIAllertViewStyle:
typedefNS_ENUM(NSInteger,UIAlertViewStyle) {
UIAlertViewStyleDefault=0,
UIAlertViewStyleSecureTextInput, //For instance, if you are asking the user for her online banking credentials
UIAlertViewStylePlainTextInput, //her phone number.
UIAlertViewStyleLoginAndPasswordInput
};
windows are expected to have a root view controller at the end of application launch
fixing solution:
#import “ViewController.h"
// go to the view
ViewController*viewController = [[ViewControlleralloc]init];
self.window.rootViewController= viewController;
neutral |ˈnjuːtr(ə)l| adjective1 not supporting or helping either side in a conflict, disagreement, etc.; impartial:neutral and non-aligned European nations.• belonging to an impartial group or state:the trial should be held on neutral ground.
recipe |ˈrɛsɪpi| nouna set of instructions for preparing a particular dish, including a list of the ingredients required: a traditional Yorkshire recipe.
-(void)viewDidAppear:(BOOL)animated{ [super viewDidAppear:animated];
      UIAlertView *alertView = [[UIAlertView alloc]
                                initWithTitle:@“Password"
message:@"Please enter your credentials:"
                                delegate:self
                                cancelButtonTitle:@"Cancel"
                                otherButtonTitles:@"Ok", nil];
      [alertView setAlertViewStyle:UIAlertViewStyleLoginAndPasswordInput];
      [alertView show];
}
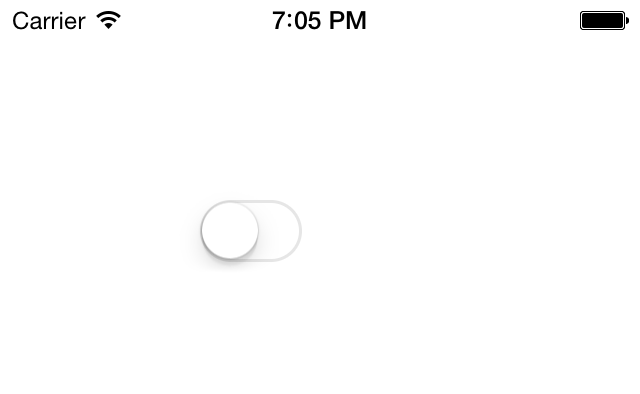
1.2. Creating and Using Switches with UISwitch
-(void)viewDidLoad{ [super viewDidLoad];
/* Create the switch */
      self.mainSwitch = [[UISwitch alloc] initWithFrame:
                       CGRectMake(100, 100, 0, 0)];
      [self.view addSubview:self.mainSwitch];
    }
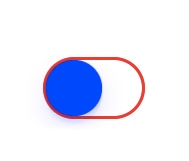
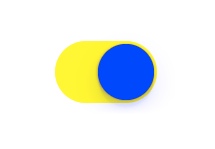
1.3. Customizing the UISwitch
tint |tɪnt| noun1 a shade or variety of a colour: the sky was taking on an apricot tint.
verb [ with obj. ]colour (something) slightly; tinge: her skin was tinted with delicate colour | (as adj. tinted) : a black car with tinted windows.
There are two main ways of customizing a switch:
Tint Colors : tintColor(offTintColor), thembTintColor, onTintColor
Images : on image and off image
knob |nɒb| noun1 a rounded lump or ball,
/* Customize the switch */
/* Adjust the off-mode tint color */
self.mainSwitch.tintColor= [UIColorredColor];
/* Adjust the on-mode tint color */
self.mainSwitch.onTintColor= [UIColoryellowColor];
/* Also change knob's tint color */
self.mainSwitch.thumbTintColor= [UIColorblueColor];
bearing in mind that custom on and off images are only for iOS 6 or older. iOS 7 ignores on and off images and uses only tint colors to customize its appearance. As mentioned before, both the on and the off images in a switch should be 77 points wide and 22 points tall.
/* Customize the switch */
        self.mainSwitch.onImage = [UIImage imageNamed:@"On"];
        self.mainSwitch.offImage = [UIImage imageNamed:@"Off"];
1.4. Picking Values with the UIPickerView
Tips: find the definition of the interface.
Press Command+Shift+O, type inUIPickerViewDataSource, and press the Enter key on your keyboard. That will send you to the place in your code where this protocol is defined
Rendering the components of the UIPickerView:(it means binding column with values so that can show as text)
The delegate of an instance ofUIPickerViewhas to conform to theUIPickerViewDelegateprotocol and must implement all the@requiredmethods of that protocol.
self.pickerView.delegate=self;
- (NSString*)pickerView:(UIPickerView*)pickerView
titleForRow:(NSInteger)row
forComponent:(NSInteger)component {
NSLog(@"Bind rows");
if([pickerViewisEqual:self.pickerView]) {
return[NSStringstringWithFormat:@"Row %ld", (long)row +1];
}
returnnil;
}
Q: What the user has actually selected in each components?
A: selectedRowInComponent:
Q: How to force all the components to reload their data?
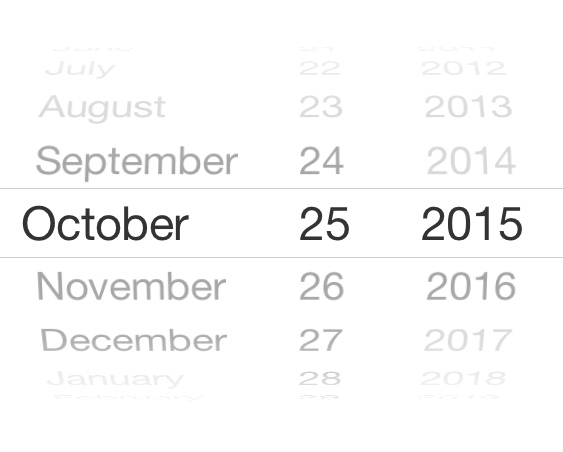
1.5. Picking the Date and Time with UIDatePicker
the Date picker mode:
typedefNS_ENUM(NSInteger, UIDatePickerMode) {
UIDatePickerModeTime, // Displays hour, minute, and optionally AM/PM designation depending on the locale setting (e.g. 6 | 53 | PM)
UIDatePickerModeDate, // Displays month, day, and year depending on the locale setting (e.g. November | 15 | 2007)
UIDatePickerModeDateAndTime, // Displays date, hour, minute, and optionally AM/PM designation depending on the locale setting (e.g. Wed Nov 15 | 6 | 53 | PM)
UIDatePickerModeCountDownTimer,// Displays hour and minute (e.g. 1 | 53)
};
set date range
/* Set date range */
NSTimeIntervaloneYearTime =365*24*60*60;// seconds
NSDate*today = [NSDatedate];
NSDate*oneYearFromToday = [todaydateByAddingTimeInterval:oneYearTime];
NSDate*twoYearFromToday = [todaydateByAddingTimeInterval:2* oneYearTime];
self.datePicker.minimumDate= oneYearFromToday;
self.datePicker.maximumDate= twoYearFromToday;
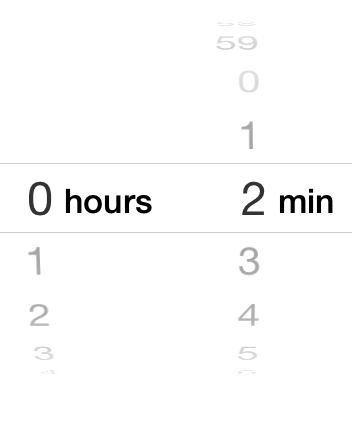
Countdown timer mode:
/* Countdown timer*/
self.datePicker= [[UIDatePickeralloc]init];
self.datePicker.center=self.view.center;
self.datePicker.datePickerMode=UIDatePickerModeCountDownTimer;
[self.viewaddSubview:self.datePicker];
NSTimeIntervaltwoMinutes =2*60;
[self.datePickersetCountDownDuration:twoMinutes];
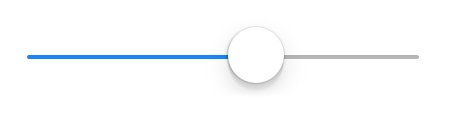
1.6. Implementing Range Pickers with UISlider
(1) normal
self.slider= [[UISlideralloc]initWithFrame:CGRectMake(0.0f,0.0f,200.0f,23.0f)];
self.slider.center=self.view.center;
self.slider.minimumValue=0.0f;
self.slider.maximumValue=100.0f;
self.slider.value=self.slider.maximumValue/2.0;
[self.viewaddSubview:self.slider];
(2) adding target:
[self.slideraddTarget:self
action:@selector(sliderValueChanged:)
forControlEvents:UIControlEventValueChanged];
- (void)sliderValueChanged:(UISlider*)paramSender {
if([paramSenderisEqual:self.slider]) {
NSLog(@"New value = %f", paramSender.value);
}
(3) different image of the thumb
[self.slidersetThumbImage:[UIImageimageNamed:@"ThumbNormal.png"]forState:UIControlStateNormal];
[self.slidersetThumbImage:[UIImageimageNamed:@"ThumbHighlighted.png"]forState:UIControlStateHighlighted];
1.7. Customizing the UISlider
/* Change the minimum value image */
[self.slidersetMinimumValueImage:[UIImageimageNamed:@"MinimumValue"]];
/* Change the minimum track image */
[self.slidersetMinimumTrackImage:[selfminimumTrackImage]forState:UIControlStateNormal];
/* Change the thumb image for both untouched and touched state */
[self.slidersetThumbImage:[UIImageimageNamed:@"Thumb"]forState:UIControlStateNormal];
[self.slidersetThumbImage:[UIImageimageNamed:@"Thumb"]forState:UIControlStateHighlighted];
/* Change the maximum value image */
[self.slidersetMaximumValueImage:[UIImageimageNamed:@"MaximumValue"]];
/* Change the maximum track image */
[self.slidersetMinimumTrackImage:[selfmaximumTrackImage]forState:UIControlStateNormal];
/*
This method returns a resizable image for the
minimum track component of the slider
*/
- (UIImage*) minimumTrackImage {
UIImage*result = [UIImageimageNamed:@"MinimumTrack"];
UIEdgeInsetsedgeInsets;
edgeInsets.left=4.0f;
edgeInsets.top=0.0f;
edgeInsets.right=0.0f;
edgeInsets.bottom=0.0f;
result = [resultresizableImageWithCapInsets:edgeInsets];
returnresult;
}
1.8. Grouping Compact Options with UISegmentedControl
NSArray*segments = [[NSArrayalloc]initWithObjects:@"iPhone",@"iPad",@"iPod",@"iMac",nil];
self.segmentedControl= [[UISegmentedControlalloc]initWithItems:segments];
self.segmentedControl.center=self.view.center;
[self.viewaddSubview:self.segmentedControl];
depict |dɪˈpɪkt| verb [ with obj. ]represent by a drawing, painting, or other art form.
momentary |ˈməʊm(ə)nt(ə)ri| adjectivelasting for a very short time
neat 1 |niːt| adjective1 arranged in a tidy way;
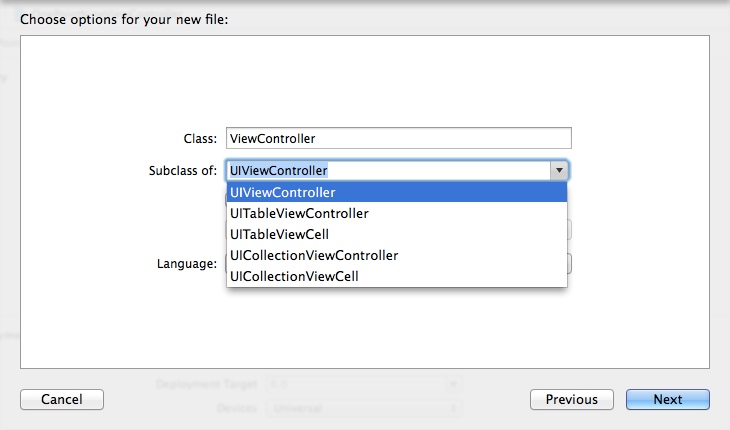
1.9. Presenting and Managing Views with UIViewController
View controllers can be loaded from.xibfiles
@interfaceAppDelegate()
@property(nonatomic,strong)UIViewController*viewController;
@end
@implementationAppDelegate
- (BOOL)application:(UIApplication*)application didFinishLaunchingWithOptions:(NSDictionary*)launchOptions {
self.viewController= [[ViewControlleralloc]initWithNibName:nilbundle:nil]; // ViewController instead of UIViewController
self.window= [[UIWindowalloc]initWithFrame:[[UIScreenmainScreen]bounds]];
/* Make our view controller the root view controller */
self.window.rootViewController=self.viewController;
self.window.backgroundColor= [UIColorwhiteColor];
[self.windowmakeKeyAndVisible];
returnYES;
}
from .xib file: ViewController.xib
self.viewController = [[ViewController alloc]
                               initWithNibName:@"ViewController"
bundle:nil];
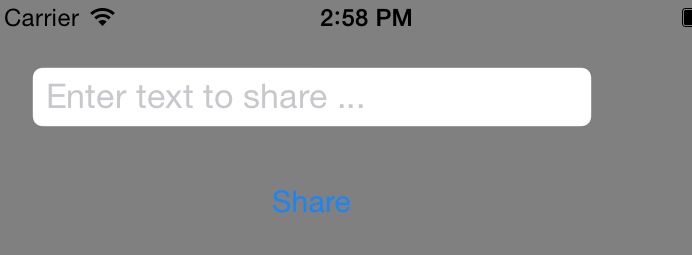
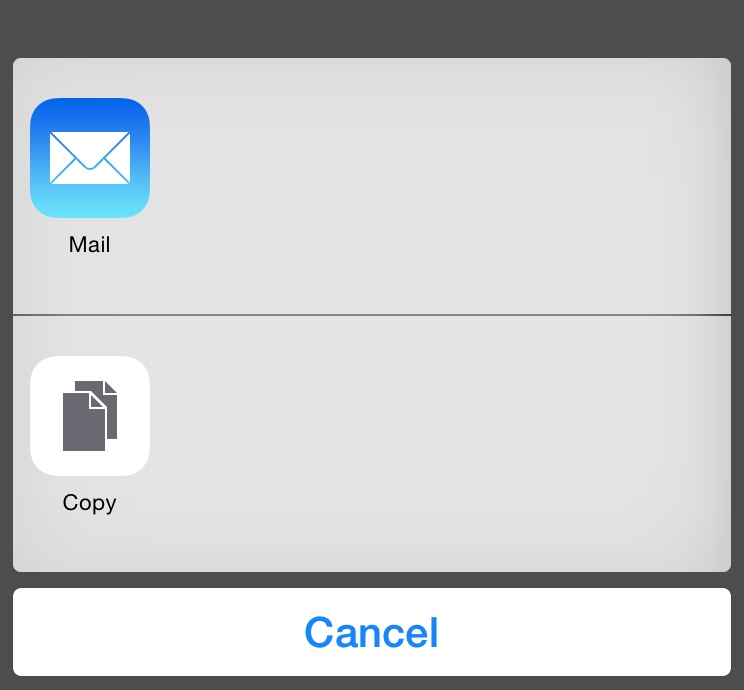
1.10. Presenting Sharing Options with UIActivityViewController
recipe |ˈrɛsɪpi| nouna set of instructions for preparing a particular dish, including a list of the ingredients required: a traditional Yorkshire recipe.
ps1: method vs message:
If it doesn’t handle the message, then nothing bad will happen; it will just return nil to the sender, or caller. This is different than the method model because, If a method is called on an object that doesn’t define the method, we end up with compile-time or run-time errors that stop us dead in our tracks.
ps2: method/message/function
01  - (int)addX:(int)x toY:(int)y {
02      int sum = x + y;
03      return sum;
04  }
(1) - (int)addX
The dash means that this is an instance method, (int) means that it will return an int value, and the name starts with “addX”.
(2) :(int)x
This means that the first parameter of this method is an int variable named x.
(3) toY:(int)y
The first part, “toY”, is actually part of the message name. The full message name is now “addX:toY:”. Reading it without the colons explains exactly what this method does, and the colons indicate where the parameters are set. The second parameter is very similar to the first; it’s an int variable named y.
(4) call method
01  int points = 100;
02  int newScore = [score addX:24 toY:points];
03  // newScore now equals 124
The description of method in this book:
(1) instantiate theUIActivityViewControllerclass using itsinitWithActivityItems:applicationActivities:initializer.
Here are the parameters to this method:
(2) initWithActivityItems
The array of items that you want to share.
(3) applicationActivities
An array of instances ofUIActivitythat represent the activities that your own application supports.
modal |ˈməʊd(ə)l| adjective1 relating to mode or form as opposed to substance.
resign and relinquish
resign |rɪˈzʌɪn| verb1 [ no obj. ] voluntarily leave a job or office
relinquish |rɪˈlɪŋkwɪʃ| verb [ with obj. ]voluntarily cease to keep or claim; give up: he relinquished his managerial role to become chief executive.
self.activityViewController=
[[UIActivityViewControlleralloc]initWithActivityItems:@[self.textField.text]
applicationActivities:nil];
[selfpresentViewController:self.activityViewController
animated:YEScompletion:^{
/* Nothing for now */
}];
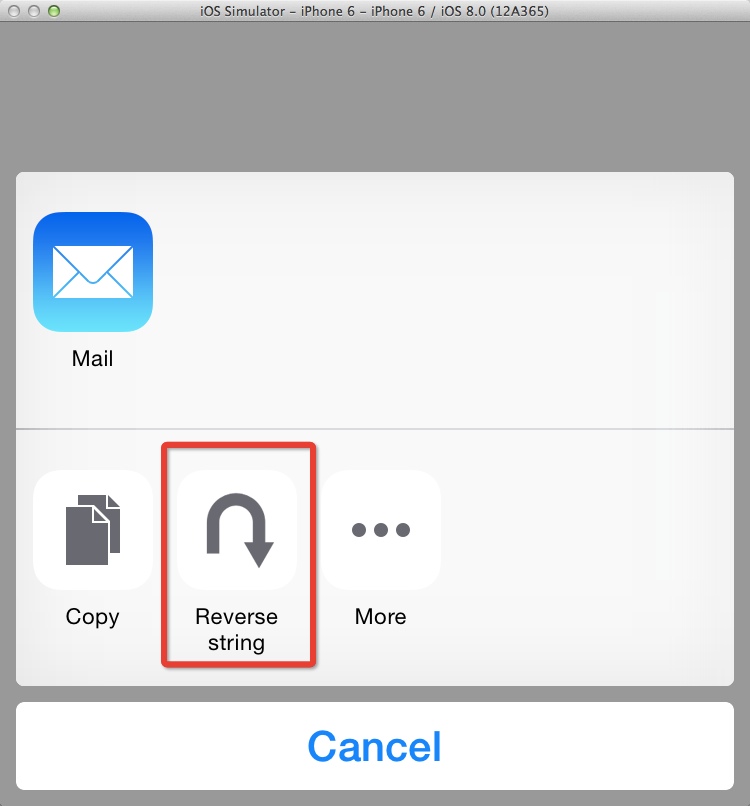
1.11. Presenting Custom Sharing Options with UIActivityViewController
archive |ˈɑːkʌɪv| noun (usu. archives)a collection of historical documents or records providing information about a place, institution, or group of people: [ asmodifier ] : a section of archive film.
In View Controller :
- (void) viewDidAppear:(BOOL)animated {
[superviewDidAppear:animated];
NSArray*itemsToShare =@[
@"Item 1",
@"Item 2",
@"Item 3",
];
UIActivityViewController*activity = [[UIActivityViewControlleralloc]
initWithActivityItems:itemsToShare
applicationActivities:@[[StringReverserActivitynew]]];
[selfpresentViewController:activityanimated:YEScompletion:nil];
}
New Activity - String reverse activity:
#import"StringReverserActivity.h"
@interfaceStringReverserActivity() <UIAlertViewDelegate]] >
@property(nonatomic,strong)NSArray*activityItems;
@end
@implementationStringReverserActivity
- (void) alertView:(UIAlertView*) alertView didDismissWithButtonIndex:(NSInteger)buttonIndex {
[selfactivityDidFinish:YES];
}
- (NSString*) activityType {
return[[NSBundlemainBundle].bundleIdentifier
stringByAppendingFormat:@".%@",NSStringFromClass([selfclass])];
}
- (NSString*) activityTitle {
return@"Reverse string";
}
- (UIImage*) activityImage {
return[UIImageimageNamed:@"Reverse"];
}
- (BOOL) canPerformWithActivityItems:(NSArray*)activityItems {
for(idobjectinactivityItems) {
if([objectisKindOfClass:[NSStringclass]]) {
returnYES;
}
}
returnNO;
}
- (void) prepareWithActivityItems:(NSArray*)activityItems {
NSMutableArray*stringObjects = [[NSMutableArrayalloc]init];
for(idobjectinactivityItems) {
if([objectisKindOfClass:[NSStringclass]]) {
[stringObjectsaddObject:object];
}
}
self.activityItems= [stringObjectscopy];
}
- (NSString*) reverseOfString:(NSString*)paramString {
NSMutableString*reversed = [[NSMutableStringalloc]initWithCapacity:[paramStringlength]];
for(NSIntegercounter = paramString.length-1; counter >=0; counter--) {
[reversedappendFormat:@"%c", [paramStringcharacterAtIndex:counter]];
}
return[reversedcopy];
}
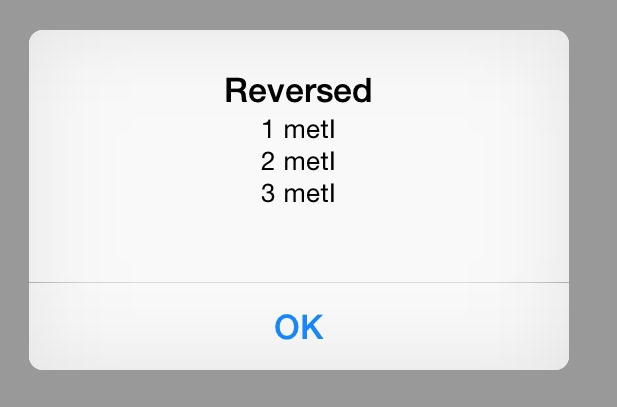
- (void) performActivity {
NSMutableString*reversed = [[NSMutableStringalloc]init];
for(NSString*stringinself.activityItems) {
[reversedappendString:[selfreverseOfString:string]];
[reversedappendString:@"\n"];
}
UIAlertView*alertView = [[UIAlertViewalloc]initWithTitle:@"Reversed"
message:reversed
delegate:self
cancelButtonTitle:@"OK"
otherButtonTitles:nil];
[alertViewshow];
}
@end
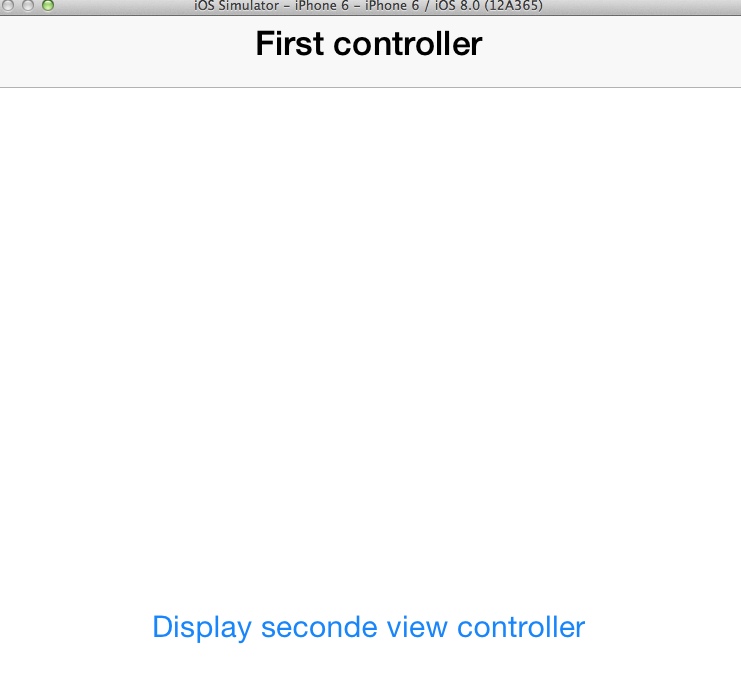
1.12. Implementing Navigation with UINavigationController
(1) AppDelegate:
- (BOOL)application:(UIApplication*)application didFinishLaunchingWithOptions:(NSDictionary*)launchOptions {
NSLog(@"did finish launching with options");
FirstViewController*viewController = [[FirstViewControlleralloc]
initWithNibName:nil
bundle:nil];
self.navigationController= [[UINavigationControlleralloc]
initWithRootViewController:viewController];
self.window= [[UIWindowalloc]
initWithFrame:[[UIScreenmainScreen]bounds]];
self.window.rootViewController=self.navigationController;
self.window.backgroundColor= [UIColorwhiteColor];
[self.windowmakeKeyAndVisible];
returnYES;
}
(2) FirstViewController:
- (BOOL)application:(UIApplication*)application didFinishLaunchingWithOptions:(NSDictionary*)launchOptions {
NSLog(@"did finish launching with options");
FirstViewController*viewController = [[FirstViewControlleralloc]
initWithNibName:nil
bundle:nil];
self.navigationController= [[UINavigationControlleralloc]
initWithRootViewController:viewController];
self.window= [[UIWindowalloc]
initWithFrame:[[UIScreenmainScreen]bounds]];
self.window.rootViewController=self.navigationController;
self.window.backgroundColor= [UIColorwhiteColor];
[self.windowmakeKeyAndVisible];
returnYES;
}
- (void) performDisplaySecondViewController:(id)paramSender {
SecondViewController*secondViewController = [[SecondViewControlleralloc]init];
[self.navigationControllerpushViewController:secondViewControlleranimated:YES];
}
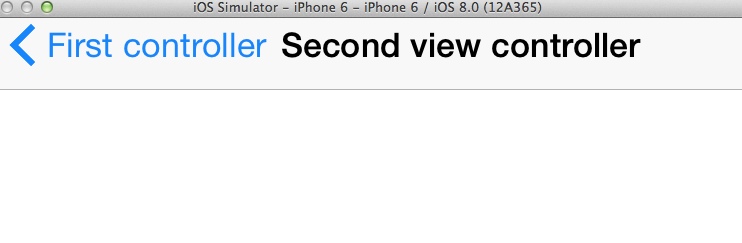
(3) SecondViewController:
- (void)viewDidLoad {
[superviewDidLoad];
self.title=@"Second view controller";
}
- (void) viewDidAppear:(BOOL)animated {
[superviewDidAppear:animated];
[selfperformSelector:@selector(goBack)withObject:nilafterDelay:5.0f];
}
- (void) goBack {
[self.navigationControllerpopViewControllerAnimated:YES];
}
1.13. Manipulating a Navigation Controller’s Array of View Controllers
transition/animation : means carton , action, etc…
/** Considering the situation that the navigation is withing array. Aforementioned code equals the following. **/
// Get the current array of view controllers
NSArray*currentControllers =self.navigationController.viewControllers;
// Create a mutable array out of this array. // ps. out of means from, based on, using
NSMutableArray*newControlers = [[NSMutableArrayalloc]initWithArray:currentControllers];
// Remove the last object from the arry
[newControlersremoveLastObject];
// // Assign this array to Navigation Controller without transition/animation
// self.navigationController.viewControllers = newControlers;
// Assign this array to Navigation Controller with animation.
[self.navigationControllersetViewControllers:newControlersanimated:YES];
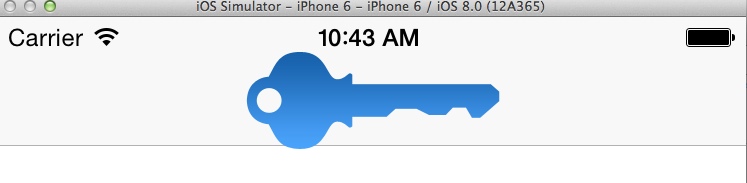
1.14. Displaying an Image on a Navigation Bar
// Create image view to replace the text view
UIImageView*imageView = [[UIImageViewalloc]initWithFrame:CGRectMake(0.0f,0.0f,100.0f,40.0f)];
imageView.contentMode=UIViewContentModeScaleAspectFill;
// Load an image, it will cached
UIImage*image = [UIImageimageNamed:@"Logo"];
// Set the image of the image view
[imageViewsetImage:image];
// Set the title view
self.navigationItem.titleView= imageView;
remedy |ˈrɛmɪdi| noun (pl. remedies)1 a medicine or treatment for a disease or injury
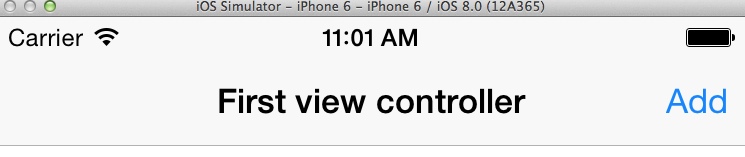
1.15. Adding Buttons to Navigation Bars Using UIBarButtonItem
/** navigation item sets with buttons **/
self.title=@"First view controller";
self.navigationItem.rightBarButtonItem= [[UIBarButtonItemalloc]initWithTitle:@"Add"
style:UIBarButtonItemStylePlain
target:self
action:@selector(performAdd:)];
// Instead of using personal button, we can use system adding button
self.navigationItem.rightBarButtonItem= [[UIBarButtonItemalloc]initWithBarButtonSystemItem:UIBarButtonSystemItemAdd
target:self
action:@selector(performAdd:)];
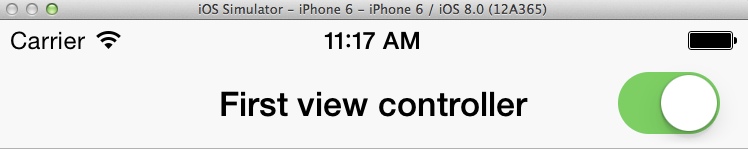
// Adding UISwithc to UIBar...
UISwitch*switchSimple = [[UISwitchalloc]init];
switchSimple.on=YES;
[switchSimpleaddTarget:self
action:@selector(switchIsChanged:)
forControlEvents:UIControlEventValueChanged];
self.navigationItem.rightBarButtonItem= [[UIBarButtonItemalloc]initWithCustomView:switchSimple];
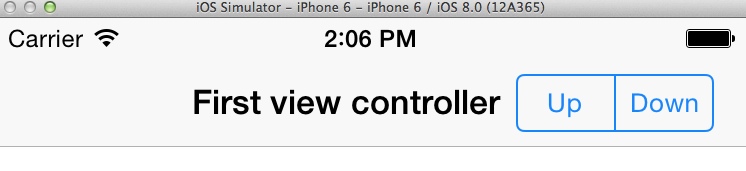
// Segment
NSArray*items =@[
@"Up",
@"Down"];
UISegmentedControl*segmentdControl = [[UISegmentedControlalloc]initWithItems:items];
segmentdControl.momentary=YES;
[segmentdControladdTarget:self
action:@selector(segmentedControlTapped:)
forControlEvents:UIControlEventValueChanged];
self.navigationItem.rightBarButtonItem= [[UIBarButtonItemalloc]initWithCustomView:segmentdControl];
1.16. Presenting Multiple View Controllers with
(1) basic
@implementationAppDelegate
- (BOOL)application:(UIApplication*)application didFinishLaunchingWithOptions:(NSDictionary*)launchOptions {
self.window= [[UIWindowalloc]initWithFrame:[[UIScreenmainScreen]bounds]];
[self.windowmakeKeyAndVisible];
FirstViewController*firstViewController = [[FirstViewControlleralloc]init];
SecondViewController*secondViewController = [[SecondViewControlleralloc]init];
UITabBarController*tabBarController = [[UITabBarControlleralloc]init];
[tabBarControllersetViewControllers:@[firstViewController, secondViewController]];
self.window.rootViewController= tabBarController;
returnYES;
}
@implementationFirstViewController
- (id)initWithNibName:(NSString*)nibNameOrNil
bundle:(NSBundle*)nibBundleOrNil {
NSLog(@"FirstViewController -- initWithNibName");
self= [superinitWithNibName:nibNameOrNilbundle:nibBundleOrNil];
if(self!=nil) {
self.title=@"First";
}
returnself;
}
- (void)viewDidLoad {
[superviewDidLoad];
self.view.backgroundColor= [UIColorwhiteColor];
}
(2) with navigation bar
@implementationAppDelegate
- (BOOL)application:(UIApplication*)application didFinishLaunchingWithOptions:(NSDictionary*)launchOptions {
self.window= [[UIWindowalloc]initWithFrame:[[UIScreenmainScreen]bounds]];
[self.windowmakeKeyAndVisible];
FirstViewController*firstViewController = [[FirstViewControlleralloc]init];
UINavigationController*firstNavigationController = [[UINavigationControlleralloc]
initWithRootViewController:firstViewController];
SecondViewController*secondViewController = [[SecondViewControlleralloc]init];
UINavigationController*secondNavigationController = [[UINavigationControlleralloc]
initWithRootViewController:secondViewController];
UITabBarController*tabBarController = [[UITabBarControlleralloc]init];
[tabBarControllersetViewControllers:@[firstNavigationController, secondNavigationController]];
self.window.rootViewController= tabBarController;
returnYES;
}
(3) with barItem image
@implementationFirstViewController
- (id)initWithNibName:(NSString*)nibNameOrNil
bundle:(NSBundle*)nibBundleOrNil {
NSLog(@"FirstViewController -- initWithNibName");
self= [superinitWithNibName:nibNameOrNilbundle:nibBundleOrNil];
if(self!=nil) {
self.title=@"First";
self.tabBarItem.image= [UIImageimageNamed:@"FirstTab"];
}
returnself;
}
1.17. Displaying Static Text with UILabel
ellipsis |ɪˈlɪpsɪs| noun (pl. ellipses |-siːz| ) the omission from speech or writing of a word or words that are superfluous or able to be understood from contextual clues. it is very rare for an ellipsis to occur without a linguistic antecedent. [ mass noun ] : an example of ellipsis.
(1) Viewed in three lines, ps 0 means any lines
@implementationViewController
- (void)viewDidLoad {
[superviewDidLoad];
CGRectlabelFrame =CGRectMake(0.0f,0.0f,100.0f,100.0f);
self.label= [[UILabelalloc]initWithFrame:labelFrame];
self.label.numberOfLines=3;
self.label.text=@"iOS 7 Programming Cookbook";
self.label.font= [UIFontboldSystemFontOfSize:14.0f];
self.label.center=self.view.center;
[self.viewaddSubview:self.label];
}
(2) Adjust font size to fit width
@implementationViewController
- (void)viewDidLoad {
[superviewDidLoad];
CGRectlabelFrame =CGRectMake(0.0f,0.0f,100.0f,23.0f);
self.label= [[UILabelalloc]initWithFrame:labelFrame];
//self.label.numberOfLines = 3;
self.label.adjustsFontSizeToFitWidth=YES;
self.label.text=@"iOS 7 Programming Cookbook";
self.label.font= [UIFontboldSystemFontOfSize:14.0f];
self.label.center=self.view.center;
[self.viewaddSubview:self.label];
}
- (void)didReceiveMemoryWarning {
[superdidReceiveMemoryWarning];
// Dispose of any resources that can be recreated.
}
1.18. Customizing the UILabel
// Big font size as well as shadowing
self.label= [[UILabelalloc]init];
self.label.backgroundColor= [UIColorclearColor];
self.label.text=@"iOS SDK";
self.label.font= [UIFontboldSystemFontOfSize:70.0f];
self.label.textColor= [UIColorblackColor];
self.label.shadowColor= [UIColorlightGrayColor];
self.label.shadowOffset=CGSizeMake(2.0f,2.0f);
[self.labelsizeToFit];
self.label.center=self.view.center;
[self.viewaddSubview:self.label];
about shadow: 1.0f , 2.0f means, 1 point right, 2 point down,
-1, -2 means, 1 point let, 2 point up.
1.19. Accepting User Text Input with UITextField
The default height of text input is 31.0
(1) Basic using
@implementationViewController
- (void)viewDidLoad {
[superviewDidLoad];
CGRecttextFieldFrame =CGRectMake(0.0f,0.0f,200.0f,31.0f);
self.textField= [[UITextFieldalloc]initWithFrame:textFieldFrame];
self.textField.borderStyle=UITextBorderStyleRoundedRect;
self.textField.contentVerticalAlignment=UIControlContentVerticalAlignmentCenter;
self.textField.textAlignment=NSTextAlignmentCenter;
self.textField.text=@"Hello you Richard";
self.textField.center=self.view.center;
[self.viewaddSubview:self.textField];
}
(2) The methods that the protocol - “UITextFieldDelegate” gives:
UITextField.h
@protocolUITextFieldDelegate <NSObject]] >
@optional
- (BOOL)textFieldShouldBeginEditing:(UITextField*)textField; // return NO to disallow editing.
- (void)textFieldDidBeginEditing:(UITextField*)textField; // became first responder
- (BOOL)textFieldShouldEndEditing:(UITextField*)textField; // return YES to allow editing to stop and to resign first responder status. NO to disallow the editing session to end
- (void)textFieldDidEndEditing:(UITextField*)textField; // may be called if forced even if shouldEndEditing returns NO (e.g. view removed from window) or endEditing:YES called
- (BOOL)textField:(UITextField*)textField shouldChangeCharactersInRange:(NSRange)range replacementString:(NSString*)string; // return NO to not change text
- (BOOL)textFieldShouldClear:(UITextField*)textField; // called when clear button pressed. return NO to ignore (no notifications)
- (BOOL)textFieldShouldReturn:(UITextField*)textField; // called when 'return' key pressed. return NO to ignore.
@end
circular |ˈsəːkjʊlə| adjective1 having the form of a circle: the building features a circular atrium.
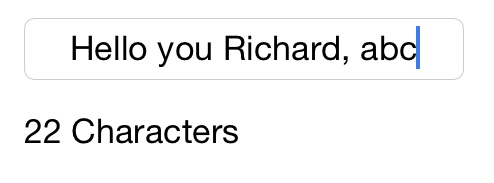
(3) Counting characters
@implementationViewController
- (void)viewDidLoad {
[superviewDidLoad];
// CGRect textFieldFrame = CGRectMake(0.0f, 0.0f, 200.0f, 31.0f);
// self.textField = [[UITextField alloc] initWithFrame:textFieldFrame];
// self.textField.borderStyle = UITextBorderStyleRoundedRect;
// self.textField.contentVerticalAlignment = UIControlContentVerticalAlignmentCenter;
// self.textField.textAlignment = NSTextAlignmentCenter;
// self.textField.text = @"Hello you Richard";
// self.textField.center = self.view.center;
// [self.view addSubview:self.textField];
CGRecttextFieldFrame =CGRectMake(38.0f,20.0f,220.0f,31.0f);
self.textField= [[UITextFieldalloc]initWithFrame:textFieldFrame];
self.textField.delegate=self;
self.textField.borderStyle=UITextBorderStyleRoundedRect;
self.textField.contentVerticalAlignment=UIControlContentVerticalAlignmentCenter;
self.textField.textAlignment=NSTextAlignmentCenter;
self.textField.text=@"Hello you Richard";
self.textField.center=self.view.center;
[self.viewaddSubview:self.textField];
CGRectlabelCounterFrame =self.textField.frame;
labelCounterFrame.origin.y+= textFieldFrame.size.height+10;
self.labelCounter= [[UILabelalloc]initWithFrame:labelCounterFrame];
[self.viewaddSubview:self.labelCounter];
[selfcalculateAndDisplayTextFieldLengthWithText:self.textField.text];
}
- (void)didReceiveMemoryWarning {
[superdidReceiveMemoryWarning];
// Dispose of any resources that can be recreated.
}
- (BOOL) textField:(UITextField*)paramTextField shouldChangeCharactersInRange:(NSRange)range
replacementString:(NSString*)string {
if([paramTextFieldisEqual:self.textField]) {
NSString*wholeString = [paramTextField.textstringByReplacingCharactersInRange:range
withString:string];
[selfcalculateAndDisplayTextFieldLengthWithText:wholeString];
}
returnYES;
}
- (BOOL) textFieldShouldReturn:(UITextField*)textField {
[textFieldresignFirstResponder];
returnYES;
}
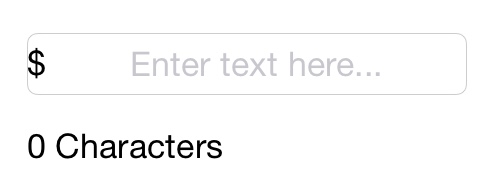
- (void) calculateAndDisplayTextFieldLengthWithText:(NSString*)paramText {
NSString*characterOrCharacters =@"Characters";
if([paramTextlength] ==1) {
characterOrCharacters =@"character";
}
self.labelCounter.text= [NSStringstringWithFormat:@"%lu %@",
(unsignedlong)paramText.length,
characterOrCharacters];
}
@end
(4) left view:
// Label currency
UILabel*labelCurrency = [[UILabelalloc]initWithFrame:CGRectZero];
labelCurrency.text= [[[NSNumberFormatteralloc]init]currencySymbol];
labelCurrency.font=self.textField.font;
[labelCurrencysizeToFit];
self.textField.leftView= labelCurrency;
self.textField.leftViewMode=UITextFieldViewModeAlways;
1.20. Displaying Long Lines of Text with UITextView
(1) Basic
@implementationViewController
- (void)viewDidLoad {
[superviewDidLoad];
self.textView= [[UITextViewalloc]initWithFrame:self.view.bounds];
self.textView.text=@"Some text here...";
self.textView.contentInset=UIEdgeInsetsMake(10.0f,0.0f,0.0f,0.0f);
self.textView.font= [UIFontsystemFontOfSize:16.0f];
[self.viewaddSubview:self.textView];
}
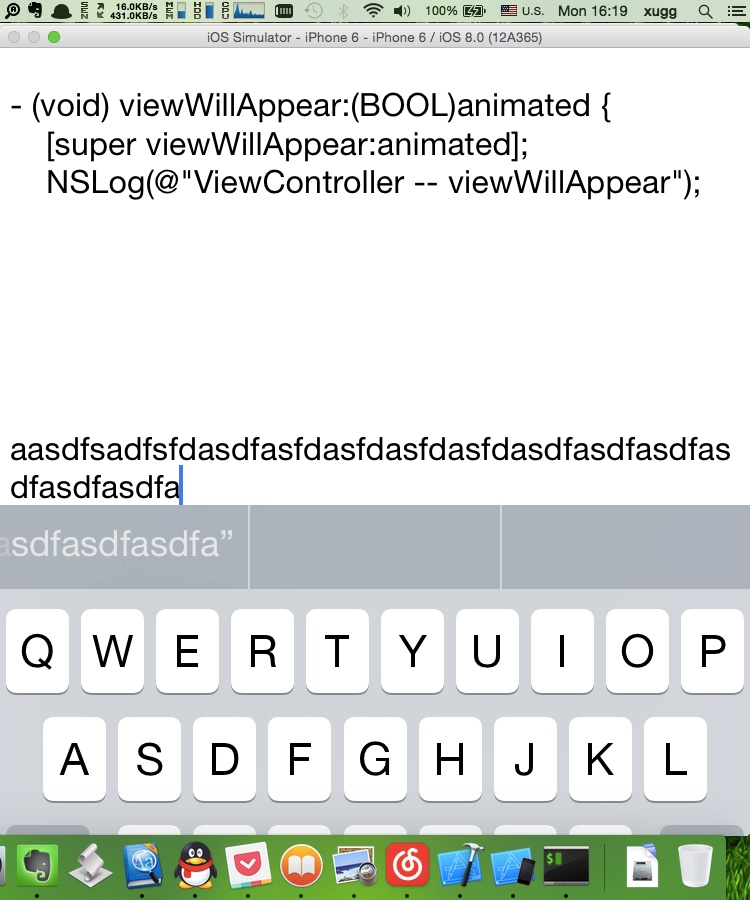
In the iOS simulator, make sure the "Hardware/Keyboard/Connect Hardware Keyboard" is not toggled.
@implementationViewController
- (void)viewDidLoad {
[superviewDidLoad];
self.textView= [[UITextViewalloc]initWithFrame:self.view.bounds];
self.textView.text=@"Some text here...";
self.textView.contentInset=UIEdgeInsetsMake(10.0f,0.0f,0.0f,0.0f);
self.textView.font= [UIFontsystemFontOfSize:16.0f];
[self.viewaddSubview:self.textView];
}
- (void) viewWillAppear:(BOOL)animated {
[superviewWillAppear:animated];
NSLog(@"ViewController -- viewWillAppear");
// Notification that the keyboard did show
[[NSNotificationCenterdefaultCenter]
addObserver:self
selector:@selector(handleKeyboardDidShow:)
name:UIKeyboardDidShowNotification
object:nil];
// Notification that the keyboard did hidden
[[NSNotificationCenterdefaultCenter]
addObserver:self
selector:@selector(handleKeyboardWillHidden:)
name:UIKeyboardWillHideNotification
object:nil];
}
- (void)didReceiveMemoryWarning {
[superdidReceiveMemoryWarning];
// Dispose of any resources that can be recreated.
}
- (void) handleKeyboardDidShow:(NSNotification*)paramNotification {
NSLog(@"ViewController -- handleKeyboardDidShow");
// Get fram of the keyboard
NSValue*keyboardRectAsObject = [[paramNotificationuserInfo]objectForKey:UIKeyboardFrameEndUserInfoKey];
// Place it in a CGRect
CGRectkeyboardRect =CGRectZero;
[keyboardRectAsObjectgetValue:&keyboardRect];
// Give a button margin to the text view that makes it
// reach to the top of the keyboard
self.textView.contentInset=UIEdgeInsetsMake(0.0f,0.0f, keyboardRect.size.height,0.0f);
}
- (void) handleKeyboardWillHidden:(NSNotification*)paramNotification {
NSLog(@"ViewController -- handleKeyboardWillHidden");
}
@end
1.21. Adding Buttons to the User Interface with UIButton
The default height ofUIButtonis 44.0f points in iOS 7.
(1) Basic
@implementationViewController
- (void)viewDidLoad {
[superviewDidLoad];
self.button= [UIButtonbuttonWithType:UIButtonTypeSystem];
self.button.frame=CGRectMake(110.0f,200.0f,100.0f,44.0f);
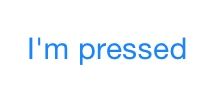
[self.buttonsetTitle:@"Press me"forState:UIControlStateNormal];
[self.buttonsetTitle:@"I'm pressed"forState:UIControlStateHighlighted];
[self.buttonaddTarget:selfaction:@selector(buttonIsPressed:)forControlEvents:UIControlEventTouchDown];
[self.buttonaddTarget:selfaction:@selector(buttonIsTapped:)forControlEvents:UIControlEventTouchUpInside];
[self.viewaddSubview:self.button];
}
- (void)didReceiveMemoryWarning {
[superdidReceiveMemoryWarning];
// Dispose of any resources that can be recreated.
}
- (void) buttonIsPressed:(UIButton*)paramSender {
NSLog(@"ViewController -- buttonIsPressed");
}
- (void) buttonIsTapped:(UIButton*)paramSender {
NSLog(@"ViewController -- buttonIsTapped");
}
@end
(2) ButtonType
UIButton.h
typedefNS_ENUM(NSInteger, UIButtonType) {
UIButtonTypeCustom =0, // no button type
UIButtonTypeSystemNS_ENUM_AVAILABLE_IOS(7_0), // standard system button
UIButtonTypeDetailDisclosure,
UIButtonTypeInfoLight,
UIButtonTypeInfoDark,
UIButtonTypeContactAdd,
UIButtonTypeRoundedRect =UIButtonTypeSystem, // Deprecated, use UIButtonTypeSystem instead
};
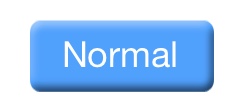
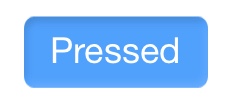
(3) Button with image
@implementationViewController
- (void)viewDidLoad {
[superviewDidLoad];
// Get images
UIImage*normalImage = [UIImageimageNamed:@"NormalBlueButton"];
UIImage*highlightedImage = [UIImageimageNamed:@"HighlightedBlueButton"];
// Init button
//self.button = [UIButton buttonWithType:UIButtonTypeSystem];
self.button= [UIButtonbuttonWithType:UIButtonTypeCustom];
self.button.frame=CGRectMake(110.0f,200.0f,100.0f,44.0f);
// Set images and titles
[self.buttonsetBackgroundImage:normalImageforState:UIControlStateNormal];
[self.buttonsetTitle:@"Normal"forState:UIControlStateNormal];
[self.buttonsetBackgroundImage:highlightedImageforState:UIControlStateHighlighted];
[self.buttonsetTitle:@"Pressed"forState:UIControlStateHighlighted];
[self.buttonaddTarget:selfaction:@selector(buttonIsPressed:)forControlEvents:UIControlEventTouchDown];
[self.buttonaddTarget:selfaction:@selector(buttonIsTapped:)forControlEvents:UIControlEventTouchUpInside];
[self.viewaddSubview:self.button];
}
1.22. Displaying Images with UIImageView
@implementationViewController
- (void)viewDidLoad {
[superviewDidLoad];
UIImage*imageMacAir = [UIImageimageNamed:@"macair"];
self.imageView= [[UIImageViewalloc]initWithImage:imageMacAir];
self.imageView.center=self.view.center;
[self.viewaddSubview:self.imageView];
}
(2) Next try: init with frame
@implementationViewController
- (void)viewDidLoad {
[superviewDidLoad];
UIImage*imageMacAir = [UIImageimageNamed:@"macair"];
//self.imageView = [[UIImageView alloc] initWithImage:imageMacAir];
self.imageView= [[UIImageViewalloc]initWithFrame:self.view.bounds];
self.imageView.image= imageMacAir;
self.imageView.center=self.view.center;
[self.viewaddSubview:self.imageView];
}
(3) with content mode type
self.imageView.contentMode=UIViewContentModeScaleAspectFill;
typedefNS_ENUM(NSInteger, UIViewContentMode) {
UIViewContentModeScaleToFill,
UIViewContentModeScaleAspectFit, // contents scaled to fit with fixed aspect. remainder is transparent
UIViewContentModeScaleAspectFill, // contents scaled to fill with fixed aspect. some portion of content may be clipped.
UIViewContentModeRedraw, // redraw on bounds change (calls -setNeedsDisplay)
UIViewContentModeCenter, // contents remain same size. positioned adjusted.
UIViewContentModeTop,
UIViewContentModeBottom,
UIViewContentModeLeft,
UIViewContentModeRight,
UIViewContentModeTopLeft,
UIViewContentModeTopRight,
UIViewContentModeBottomLeft,
UIViewContentModeBottomRight,
};
1.23. Creating Scrollable Content with UIScrollView
(1) Basic - scroll a image view
@implementation ViewController
- (void)viewDidLoad {
[super viewDidLoad];
UIImage *image = [UIImage imageNamed:@"macair"];
self.imageView = [[UIImageView alloc] initWithImage:image];
self.scrollView = [[UIScrollView alloc] initWithFrame:self.view.bounds];
[self.scrollView addSubview:self.imageView];
self.scrollView.contentSize = self.imageView.bounds.size;
[self.view addSubview:self.scrollView];
}
(2) Scroll view delegate - transpotation
decelerate|ˌdiːˈseləreɪt|A.intransitive verb①Automobile, Mechanics «vehicle, machine» 减速
pedal 1 |ˈpɛd(ə)l| noun1 each of a pair of foot-operated levers used for powering a bicycle or other vehicle propelled by the legs.
coast |kəʊst| noun1 the part of the land adjoining or near the sea: the west coast of Africa | they sailed further up the coast.• (the Coast) N. Amer. the Pacific coast of North America.2 the easy movement of a vehicle without the use of power. once the coast to the moon had begun, Apollo was separated from the third stage.
@implementation ViewController
- (void)viewDidLoad {
NSLog(@"view did load");
[super viewDidLoad];
UIImage *image = [UIImage imageNamed:@"macair"];
self.imageView = [[UIImageView alloc] initWithImage:image];
self.scrollView = [[UIScrollView alloc] initWithFrame:self.view.bounds];
[self.scrollView addSubview:self.imageView];
self.scrollView.contentSize = self.imageView.bounds.size;
self.scrollView.delegate = self;
[self.view addSubview:self.scrollView];
}
- (void)didReceiveMemoryWarning {
[super didReceiveMemoryWarning];
// Dispose of any resources that can be recreated.
}
- (void) scrollViewDidScroll:(UIScrollView *)scrollView {
NSLog(@"scrollView did scroll");
// Gets called when user scrolls or drags
self.scrollView.alpha = 0.50f;
}
- (void) scrollViewDidEndDecelerating:(UIScrollView *)paramScrollView {
NSLog(@"scroll view did end decelerating");
// Gets called only after scrolling
self.scrollView.alpha = 1.0f;
}
- (void) scrollViewDidEndDragging:(UIScrollView *)paramScrollView willDecelerate:(BOOL)decelerate{
NSLog(@"scroll view did end dragging");
// Make sure the alpha is reset even if the user is dragging
self.scrollView.alpha = 1.0f;
}
@end
(3) pagination
pagination |ˌpadʒɪˈneɪʃ(ə)n| noun [ mass noun ] the sequence of numbers assigned to pages in a book or periodical. later editions are identical in text and pagination.
@implementation ViewController
- (void)viewDidLoad {
NSLog(@"view did load");
[super viewDidLoad];
// UIImage *image = [UIImage imageNamed:@"macair"];
// self.imageView = [[UIImageView alloc] initWithImage:image];
//
// self.scrollView = [[UIScrollView alloc] initWithFrame:self.view.bounds];
// [self.scrollView addSubview:self.imageView];
// self.scrollView.contentSize = self.imageView.bounds.size;
// self.scrollView.delegate = self;
// self.scrollView.indicatorStyle = UIScrollViewIndicatorStyleWhite;
// [self.view addSubview:self.scrollView];
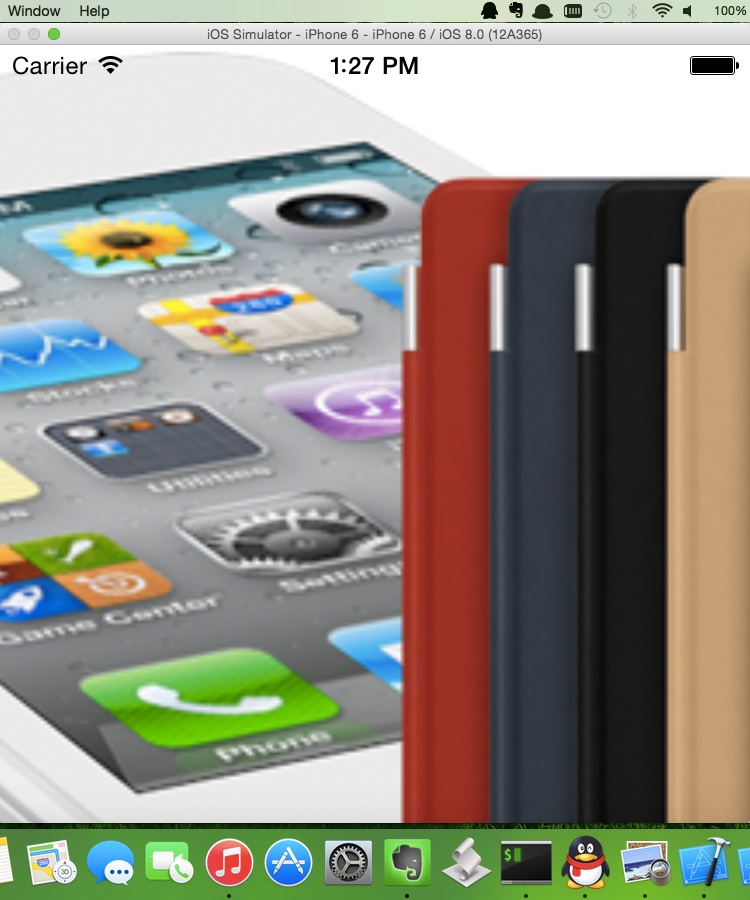
UIImage *imageIPhone = [UIImage imageNamed:@"iPhone"];
UIImage *imageIPad = [UIImage imageNamed:@"iPad"];
UIImage *imageMacBookAir = [UIImage imageNamed:@"MacBookAir"];
CGRect scrollViewFrame = self.view.bounds;
self.scrollView = [[UIScrollView alloc] initWithFrame:scrollViewFrame];
self.scrollView.pagingEnabled = YES;
self.scrollView.contentSize = CGSizeMake(scrollViewFrame.size.width * 3.0f, scrollViewFrame.size.height);
[self.view addSubview:self.scrollView];
CGRect imageViewFrame = self.view.bounds;
UIImageView *imageViewIPhone = [self newImageViewWithImage:imageIPhone frame:imageViewFrame];
[self.scrollView addSubview:imageViewIPhone];
// Go to next page by moving the x position of the next image view
imageViewFrame.origin.x += imageViewFrame.size.width;
UIImageView *imageViewIPad = [self newImageViewWithImage:imageIPad frame:imageViewFrame];
[self.scrollView addSubview:imageViewIPad];
// Go to next page by moving the x position of the next image view
imageViewFrame.origin.x += imageViewFrame.size.width;
UIImageView *imageViewMacBookAir = [self newImageViewWithImage:imageMacBookAir frame:imageViewFrame];
[self.scrollView addSubview:imageViewMacBookAir];
}
- (void)didReceiveMemoryWarning {
[super didReceiveMemoryWarning];
// Dispose of any resources that can be recreated.
}
- (void) scrollViewDidScroll:(UIScrollView *)scrollView {
NSLog(@"scrollView did scroll");
// Gets called when user scrolls or drags
self.scrollView.alpha = 0.50f;
}
- (void) scrollViewDidEndDecelerating:(UIScrollView *)paramScrollView {
NSLog(@"scroll view did end decelerating");
// Gets called only after scrolling
self.scrollView.alpha = 1.0f;
}
- (void) scrollViewDidEndDragging:(UIScrollView *)paramScrollView willDecelerate:(BOOL)decelerate{
NSLog(@"scroll view did end dragging");
// Make sure the alpha is reset even if the user is dragging
self.scrollView.alpha = 1.0f;
}
- (UIImageView *) newImageViewWithImage:(UIImage *)paramImage frame:(CGRect)paramFrame {
UIImageView *result = [[UIImageView alloc] initWithFrame:paramFrame];
result.contentMode = UIViewContentModeScaleAspectFill;
result.image = paramImage;
return result;
}
@end
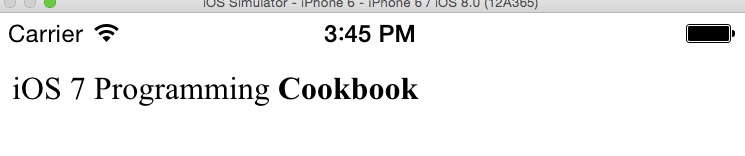
1.24. Loading Web Pages with UIWebView
(1) Basic - html
@implementation ViewController
- (void)viewDidLoad {
[super viewDidLoad];
self.webView = [[UIWebView alloc] initWithFrame:self.view.bounds];
[self.view addSubview:self.webView];
NSString *htmlString = @"<br> iOS 7 Programming <strong>Cookbook</strong>";
[self.webView loadHTMLString:htmlString baseURL:nil];
}
(2) Basic - internet
self.webView = [[UIWebView alloc] initWithFrame:self.view.bounds];
self.webView.scalesPageToFit = YES;
[self.view addSubview:self.webView];
NSURL *url = [NSURL URLWithString:@"http://www.apple.com"];
NSURLRequest *request = [NSURLRequest requestWithURL:url];
1.25. Displaying Progress with UIProgressView
depict |dɪˈpɪkt| verb [ with obj. ] represent by a drawing, painting, or other art form.
(1) Basic
@implementation ViewController
- (void)viewDidLoad {
[super viewDidLoad];
self.progressView = [[UIProgressView alloc] initWithProgressViewStyle:UIProgressViewStyleBar];
self.progressView.center = self.view.center;
self.progressView.progress = 20.0f / 30.0f;
[self.view addSubview:self.progressView];
}
1.26. Constructing and Displaying Styled Texts
canvas |ˈkanvəs| noun [ mass noun ] (pl.canvases or canvasses) a strong, coarse unbleached cloth made from hemp, flax, or a similar yarn, used to make items such as sails and tents and as a surface for oil painting.
@implementation ViewController
- (void)viewDidLoad {
[super viewDidLoad];
self.label = [[UILabel alloc] init];
self.label.backgroundColor = [UIColor clearColor];
self.label.attributedText = [self attributedText];
[self.label sizeToFit];
self.label.center = self.view.center;
[self.view addSubview:self.label];
}
- (void)didReceiveMemoryWarning {
[super didReceiveMemoryWarning];
// Dispose of any resources that can be recreated.
}
- (NSAttributedString *) attributedText {
NSString *string = @"iOS SDK";
NSMutableAttributedString *result = [[NSMutableAttributedString alloc] initWithString:string];
NSDictionary *attributesForFirstWord = @{
NSFontAttributeName : [UIFont boldSystemFontOfSize:60.0f],
NSForegroundColorAttributeName : [UIColor redColor],
NSBackgroundColorAttributeName : [UIColor grayColor]
};
NSShadow *shadow = [[NSShadow alloc] init];
shadow.shadowColor = [UIColor darkGrayColor];
shadow.shadowOffset = CGSizeMake(4.0f, 4.0f);
NSDictionary *attributesForSecondWord = @{
NSFontAttributeName : [UIFont boldSystemFontOfSize:60.0f],
NSForegroundColorAttributeName : [UIColor whiteColor],
NSBackgroundColorAttributeName : [UIColor redColor],
NSShadowAttributeName : shadow
};
// Find the string "iOS" in the whole string and sets its attribute
[result setAttributes:attributesForFirstWord range:[string rangeOfString:@"iOS"]];
// Do the same thing for the string "SDK"
[result setAttributes:attributesForSecondWord range:[string rangeOfString:@"SDK"]];
return [[NSAttributedString alloc] initWithAttributedString:result];
}
@end

1.27. Presenting Master-Detail Views with UISplitViewController
breadcrumb |ˈbrɛdkrʌm| noun1 a small fragment of bread.
iPad has two orientation:
landscape landscape |ˈlan(d)skeɪp| noun1 all the visible features of an area of land, often considered in terms of their aesthetic appeal: the soft colours of the Northumbrian landscape | a bleak urban landscape.
portrait portrait |ˈpɔːtrɪt| noun1 a painting, drawing, photograph, or engraving of a person, especially one depicting only the face or head and shoulders. a portrait of George III. [ as modifier ] : a portrait painter.
1.28. Enabling Paging with UIPageViewController
(1) UIPageViewCon trollerDelegate:
@protocol UIPageViewControllerDelegate <NSObject]] >
@optional
// Sent when a gesture-initiated transition begins.
- (void)pageViewController:(UIPageViewController *)pageViewController willTransitionToViewControllers:(NSArray *)pendingViewControllers NS_AVAILABLE_IOS(6_0);
// Sent when a gesture-initiated transition ends. The 'finished' parameter indicates whether the animation finished, while the 'completed' parameter indicates whether the transition completed or bailed out (if the user let go early).
- (void)pageViewController:(UIPageViewController *)pageViewController didFinishAnimating:(BOOL)finished previousViewControllers:(NSArray *)previousViewControllers transitionCompleted:(BOOL)completed;
// Delegate may specify a different spine location for after the interface orientation change. Only sent for transition style 'UIPageViewControllerTransitionStylePageCurl'.
// Delegate may set new view controllers or update double-sided state within this method's implementation as well.
- (UIPageViewControllerSpineLocation)pageViewController:(UIPageViewController *)pageViewController spineLocationForInterfaceOrientation:(UIInterfaceOrientation)orientation;
- (NSUInteger)pageViewControllerSupportedInterfaceOrientations:(UIPageViewController *)pageViewController NS_AVAILABLE_IOS(7_0);
- (UIInterfaceOrientation)pageViewControllerPreferredInterfaceOrientationForPresentation:(UIPageViewController *)pageViewController NS_AVAILABLE_IOS(7_0);
@end
(a) important method 1
// Sent when a gesture-initiated transition ends. The 'finished' parameter indicates whether the animation finished, while the 'completed' parameter indicates whether the transition completed or bailed out (if the user let go early).
- (void)pageViewController:(UIPageViewController *)pageViewController didFinishAnimating:(BOOL)finished previousViewControllers:(NSArray *)previousViewControllers transitionCompleted:(BOOL)completed;
The first method gets called when the user turns to the next or the previous page, or if the user initiates the movement from one page to the other but decides against it while the page is moving (in which case, the user gets sent back to the page she was on before). The transitionCompleted will get set to YES if this was a successful page animation, or set to NO if the user decided against the movement and cancelled it in the middle of the animation.
(b) important method 2
// Delegate may specify a different spine location for after the interface orientation change. Only sent for transition style 'UIPageViewControllerTransitionStylePageCurl'.
// Delegate may set new view controllers or update double-sided state within this method's implementation as well.
- (UIPageViewControllerSpineLocation)pageViewController:(UIPageViewController *)pageViewController spineLocationForInterfaceOrientation:(UIInterfaceOrientation)orientation;
The second method gets called whenever the device orientation changes. You can use this method to specify the location of the spine for the pages by returning a value of type UIPageViewControllerSpineLocation:
spine |spaɪn|noun① Countable(spinal column) 脊柱
typedef NS_ENUM(NSInteger, UIPageViewControllerSpineLocation) {
UIPageViewControllerSpineLocationNone = 0, // Returned if 'spineLocation' is queried when 'transitionStyle' is not 'UIPageViewControllerTransitionStylePageCurl'.
UIPageViewControllerSpineLocationMin = 1, // Requires one view controller.
UIPageViewControllerSpineLocationMid = 2, // Requires two view controllers.
UIPageViewControllerSpineLocationMax = 3 // Requires one view controller.
}; // Only pertains to 'UIPageViewControllerTransitionStylePageCurl'.
(2) UIPage ViewControllerDataSource
@protocol UIPageViewControllerDataSource <NSObject]] >
@required
// In terms of navigation direction. For example, for 'UIPageViewControllerNavigationOrientationHorizontal', view controllers coming 'before' would be to the left of the argument view controller, those coming 'after' would be to the right.
// Return 'nil' to indicate that no more progress can be made in the given direction.
// For gesture-initiated transitions, the page view controller obtains view controllers via these methods, so use of setViewControllers:direction:animated:completion: is not required.
- (UIViewController *)pageViewController:(UIPageViewController *)pageViewController viewControllerBeforeViewController:(UIViewController *)viewController;
- (UIViewController *)pageViewController:(UIPageViewController *)pageViewController viewControllerAfterViewController:(UIViewController *)viewController;
@optional
// A page indicator will be visible if both methods are implemented, transition style is 'UIPageViewControllerTransitionStyleScroll', and navigation orientation is 'UIPageViewControllerNavigationOrientationHorizontal'.
// Both methods are called in response to a 'setViewControllers:...' call, but the presentation index is updated automatically in the case of gesture-driven navigation.
- (NSInteger)presentationCountForPageViewController:(UIPageViewController *)pageViewController NS_AVAILABLE_IOS(6_0); // The number of items reflected in the page indicator.
- (NSInteger)presentationIndexForPageViewController:(UIPageViewController *)pageViewController NS_AVAILABLE_IOS(6_0); // The selected item reflected in the page indicator.
@end